In the previous post we setup the Sonoff TRVZBs to work using an external temperature sensor to provide more accurate room temperature control. In this next post we will build a new dashboard in Home Assistant along with a NodeRed flow to allow each room temperature to be set independently and driven from the main boiler control/thermostat. In my case I am using a Netatmo boiler thermostat that is also connected to Home Assistant but any controller should work.
To do this we will create new helpers to allow a temperature offset to be applied to each room you wish to control individually. Then by using NodeRed we can sum the main house thermostat with the room temperature offset to adjust the room temperature applied to the thermostatic radiator valve. In this way, if we increase the house temperature by say 3 degrees then each TRV will increase by 3 degrees and the room offset allows us to set different temperatures for each room. In the same way if we reduce the room house temperature we need to reduce the room temperatures accordingly. However, when the thermostat switches the boiler off we do not want to switch off all the TRVs or we will cut the heat to each room and the remaining residual water heat would be applied to the one radiator in the system without a TRV that exists for that very purpose.
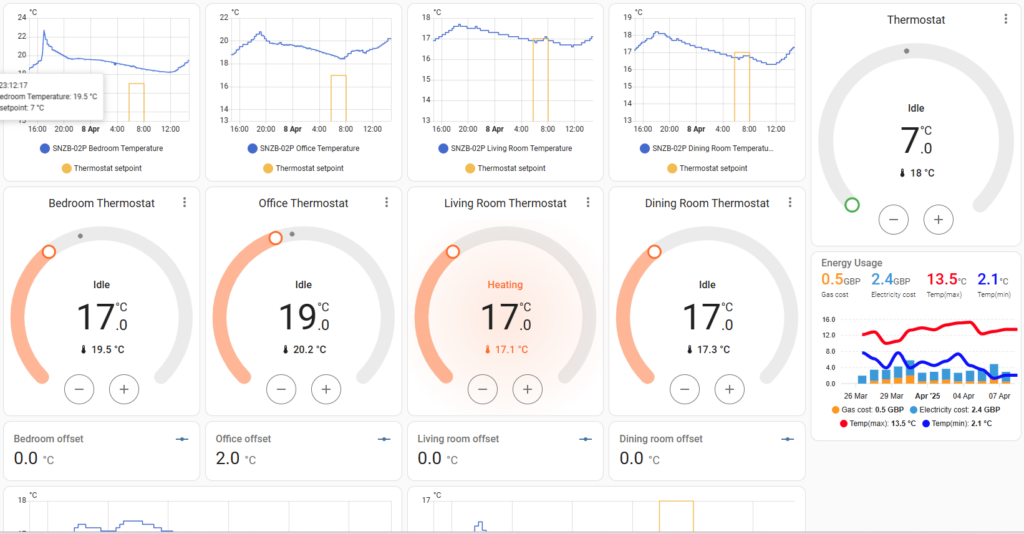
The dashboard I have created shows the a graph of the room temperature along with the he thermostat set point, the individual TRV thermostat controls, the room temperature offset controls and the main house thermostat control:
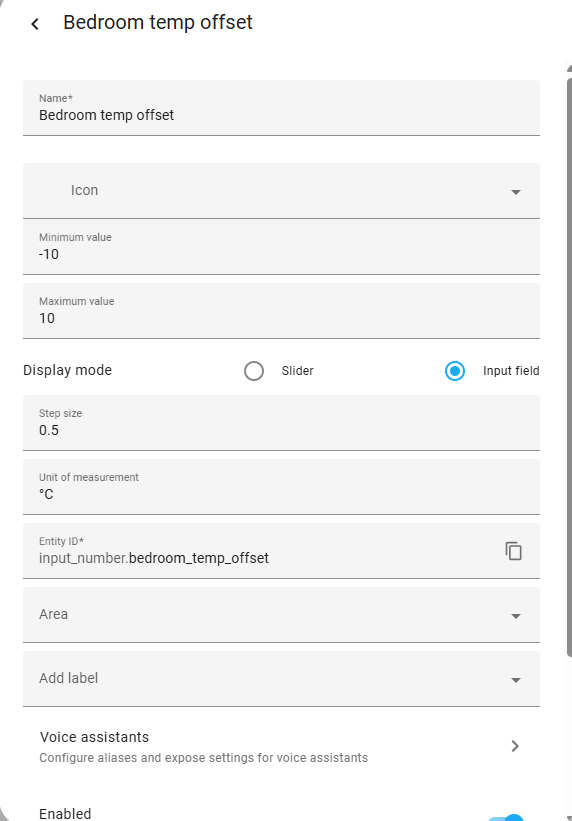
First we will create the offset controls. This is again done using helpers so navigate to the Settings | Devices and services page and select the Helpers tab. This time we will use a Number helper as below (remember it’s Name as we will need this for the NodeRed flow we are going to create. We will need a helper for each room we setup:
Next we need to create a sensor from the house thermostat by adding the following to configuration.yaml. You may already have a sensor section, if so exclude the sensor: line and add the remainder within your existing section
sensor:
- platform: template
sensors:
thermostat_setpoint:
value_template: "{{ state_attr('climate.living_room','temperature')}}"
unit_of_measurement: "°C"
friendly_name: "Thermostat setpoint"
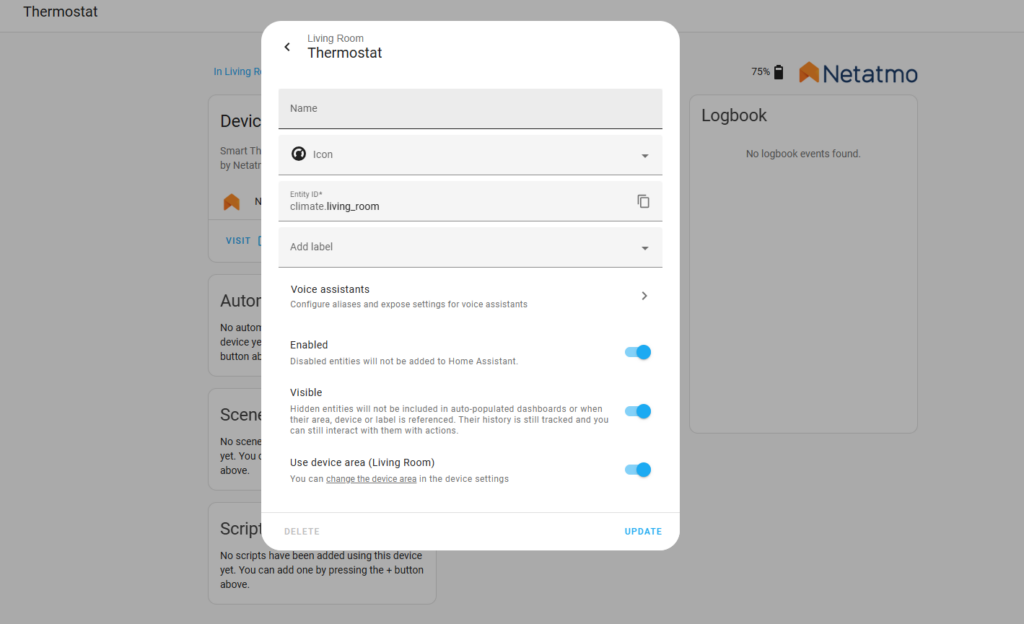
unique_id: thermostat_setpoint In my case I am using ‘climate.living_room’,’temperature’ for the value template.
From my Thermostat I can find the relevant Entity ID
And then making use of the Developer Tools navigate to the States tab and put your entity ID in here and you can see all the relevant attributes. In my case I want temperature:

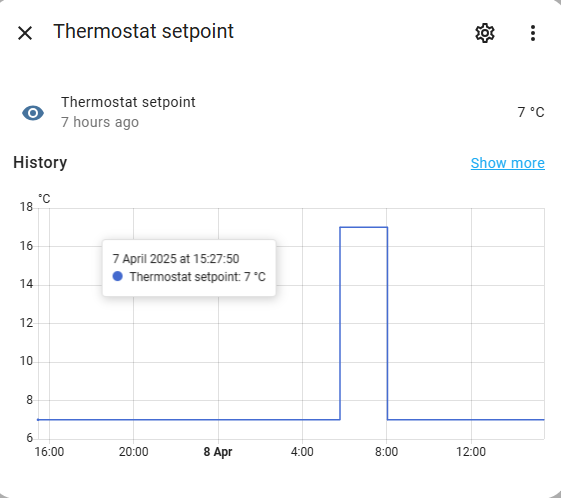
This will then allow us to easily track the thermostat setpoint and feed this into our NodeRed flow and make use of it on the temperature graphs on our dashboard as above
Once all the helpers and thermostat sensor have been created and our dashboard has been built we now need to create the NodeRed flow to connect it all together to give us our working system:
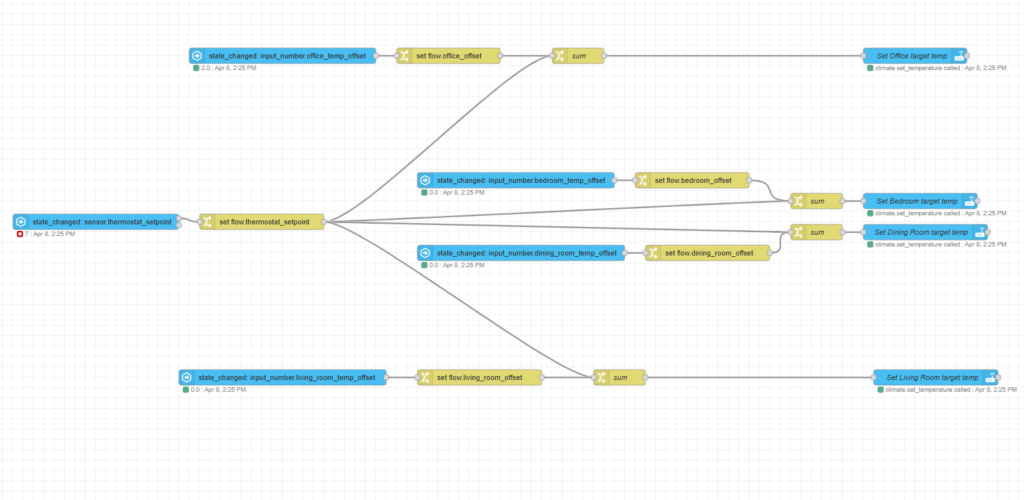
For each room we have two paths summed together. So for each path we have an events: state node connected to a change node. These two paths both feed into another change node to sum the two values and then the output goes into an action node to set the TRV temperature.
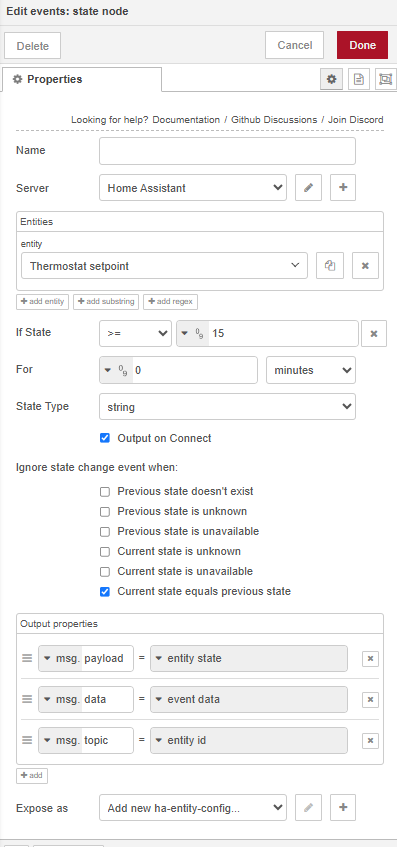
Bedroom_target_temp = thermostat_setpoint + bedroom_temp_offsetStart by adding the events:state node to the page to detect a state change of the thermostat. The enitity for this will be our created sensor Thermostat setpoint. Be sure to tick Output on connect so that the states are set on connecting so that it is always correct. I also created a rule so that this sensor only fires if the temperature is above 15 degrees. My thermostat schedules set the thermostat to 7 when the heating is off and 15 degrees is too low a temperature for the thermostat to ever be set to (You could choose lower so long as this value is above the minimum temperature you use in your thermostat schedules. In this way, when the thermostat switches the heating off (ie sets it to 7) the flow will not fire and the TRVs will remain in their previous state. This prevents the flow from closing all the TRVS when the heating switches off.
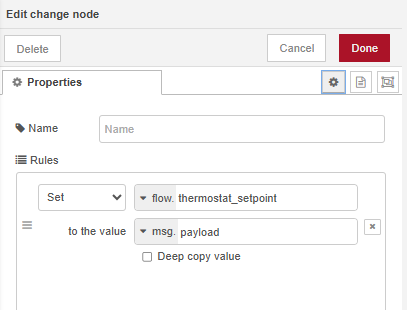
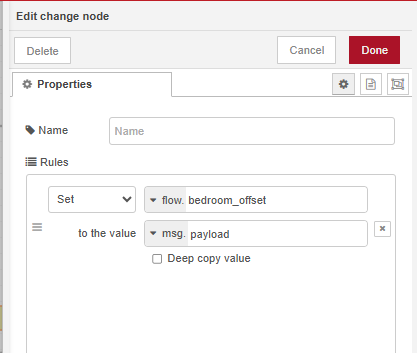
Now we need to feed the output of the previous node into another change node sop that we can sum this with the offset
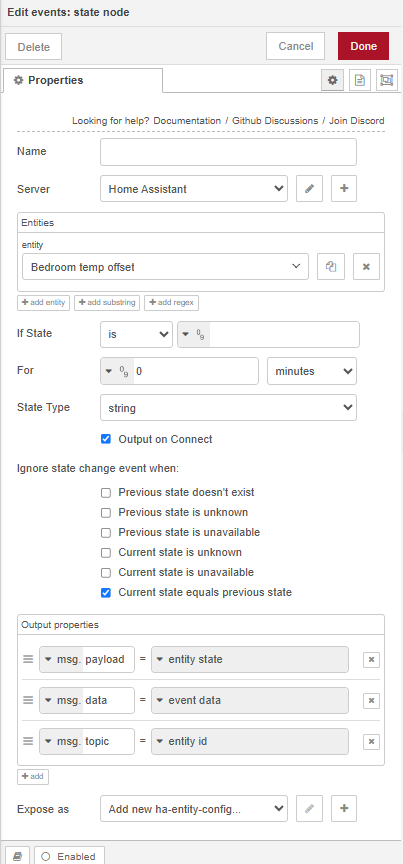
We do the same for the temperature offset except in this case we dont need to set an if condition for the state as we want this to fire whenever the offset is changed:
And now we can feed both branches into another change node to sum the two values
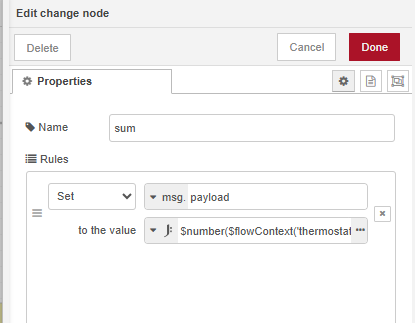
The json for the value is below. Note the conversion of all data to $number:
$number($flowContext('thermostat_setpoint'))+$number($flowContext('office_offset'))Then the output of our sum feeds into the action node to set the TRV temperature value
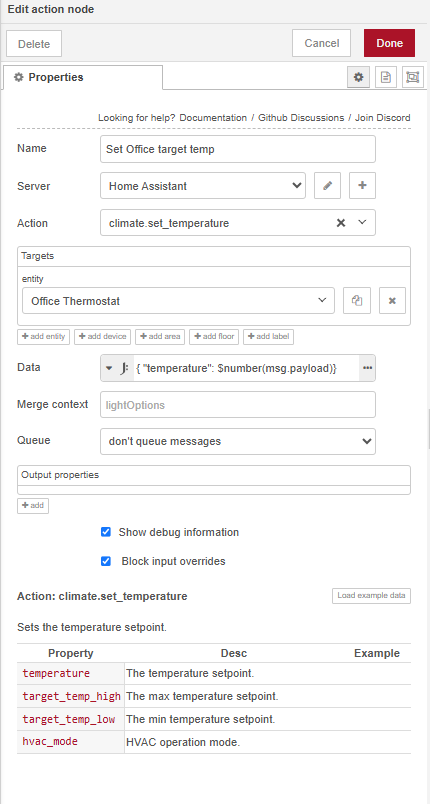
The json for the data is below and again note the conversion to $number:
{ "temperature": $number(msg.payload)}The result is that we can now set the TRV to its setpoint by either adjusting the main thermostat or adjusting the setpoint. You could take this one step further and automate the offsets to apply different offsets at different times of the day if you so desire but I found simply adjusting the offset where necessary for different rooms means you can then simply rely on the main thermostat to control the overall temperature. At any time from the dashboard you can adjust the individual TRV temperatures to adjust the temperatures in any room and when the thermostat next changes its temperature (above 15 degrees) they will set back to normal operation.