How to setup Sonoff TRVZV thermostatic radiator valves with an external temperature sensor (in my case the Sonoff SNZB-02P) using Home Assistant.
I recently added Sonoff TRVZB Radiator valves to my radiators to give the benefit of a thermostatic radiator valve that is digital and controllable. Whilst the Sonoff valves are a vast improvement on the existing mechanical thermostatic valves they were replacing, they are still plagued by the same problems of having the temperature sensor in the valve next to the heat source. Thus fine tuning of room temperatures is better but still leaves plenty of room for improvement.
Sonoff themselves allow you to bind an external sensor to the valves for this purpose but this requires you to use eWeLink and have the control done by the eWeLink app. I however, wanted to make use of my Netatmo boiler thermostat and Home Assistant. After much looking around on the internet and several attempts at solving the problem I landed on the following solution.
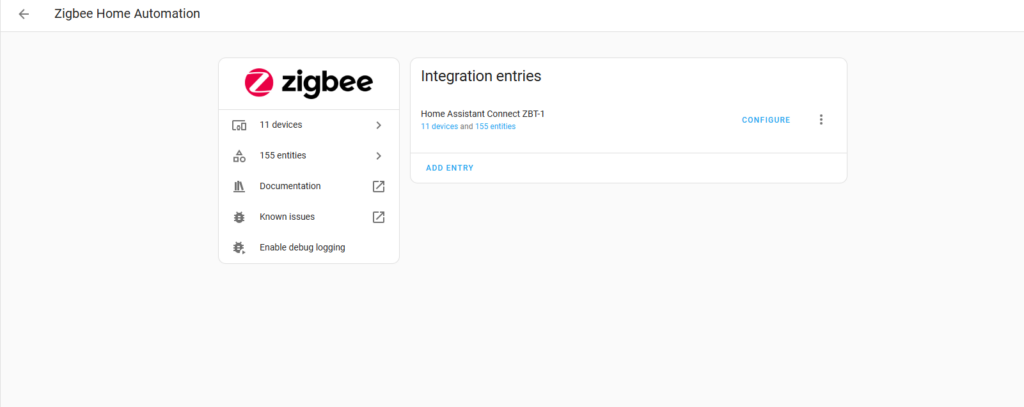
Firstly I am already making use of the Home Assistant Connect ZBT-1 to connect my Zigbee devices to Home Assistant so firstly ensure all your devices are connected and working properly. To do this you will need to have the Zigbee Home Automation integration
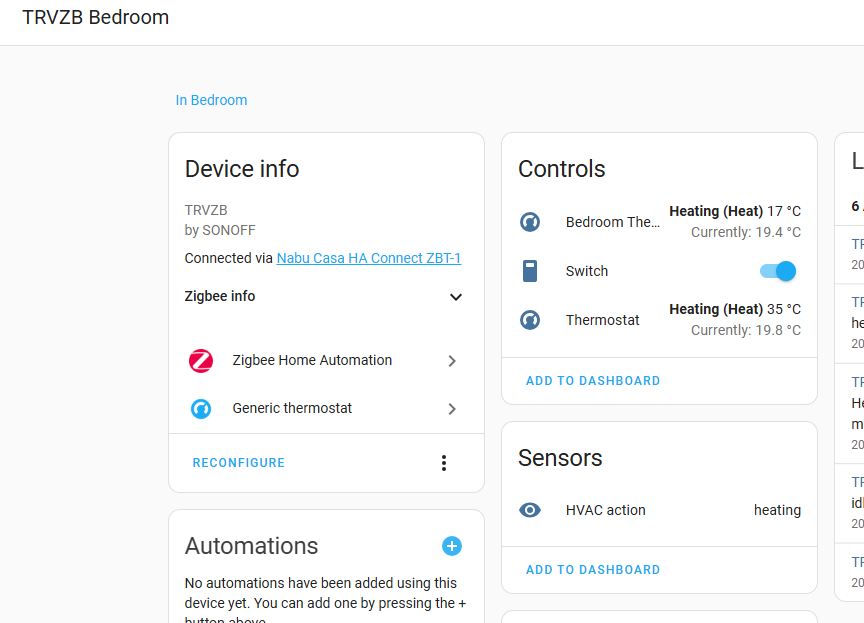
First, find your newly added thermostatic radiator valve. In my case this is TRVZB Bedroom here:
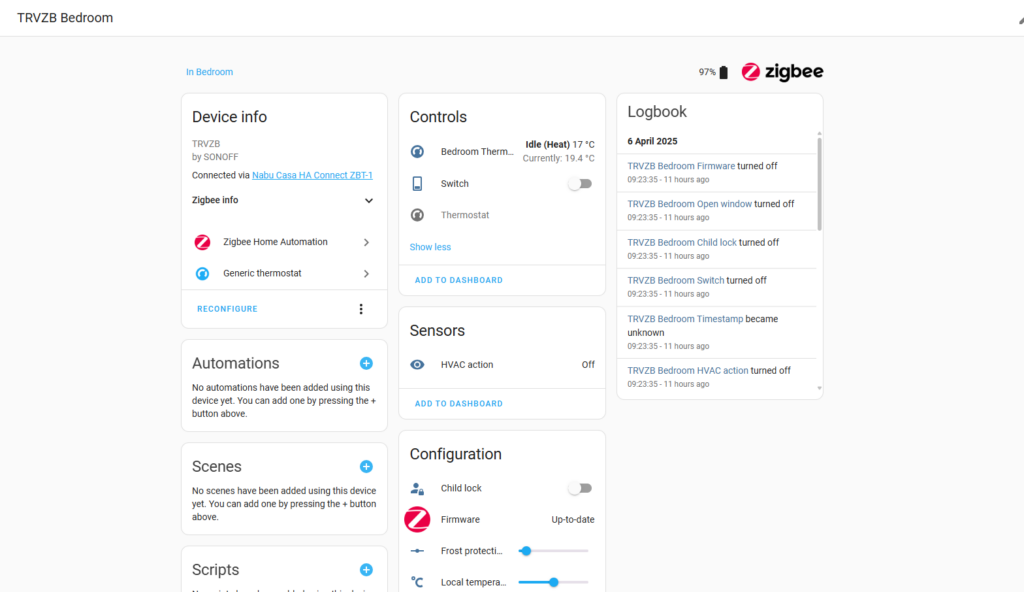
This is already configured so ignore the other controls but the one we need to remember here is Switch. We need this to configure the helper.
Once you have all your devices installed and working correctly you will need to create a generic thermostat helper. Navigate to the Settings | Devices and services page and select the Helpers tab. From here you can create a new thermostat helper. For the helper here I am going to call this Bedroom Thermostat.
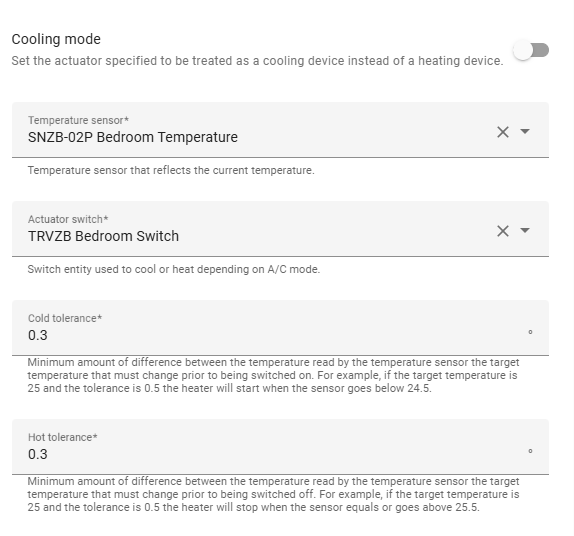
Set the Temperature sensor to the device you wish t use as the external temperature sensor. In this case I am using my SNZB-02P Bedroom Temperature sensor.
Here you need to set the Actuator switch to the value of the TRVZB Switch we found above.
The remaining values I have left at their defaults.
Once you have done this you then need to return to your TRVZB Device and you should now have two Thermostat controls, the original Thermostat along with your newly created thermostat, in my case, Bedroom Thermostat
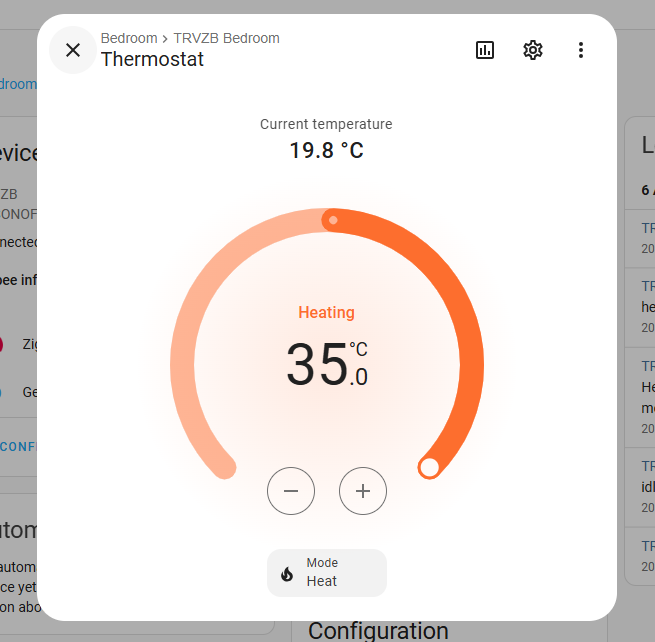
Next we need to make sure we are only using our new thermostat helper we have created Bedroom Thermostat) so first go to the original Thermostat and set the Temperature to its maximum (in my case 35 degrees Centigrade). This ensures we don’t have the original thermostat interfering with our newly created thermostat helper.
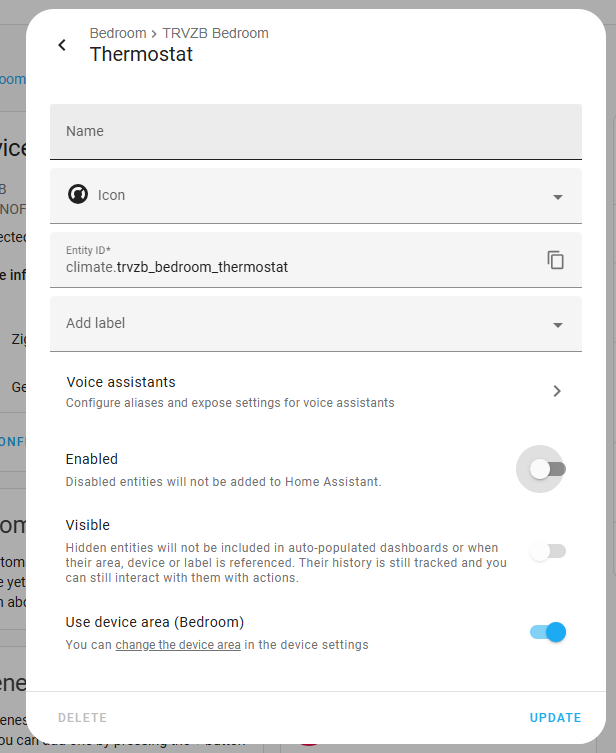
Now we can disable the original thermostat
And now we should be left with a single active thermostat for our TRVZB that is using our newly created helper bound to the external temperature sensor

You will need to repeat this process for each thermostatic radiator valve that you wish to bind to an external temperature sensor.
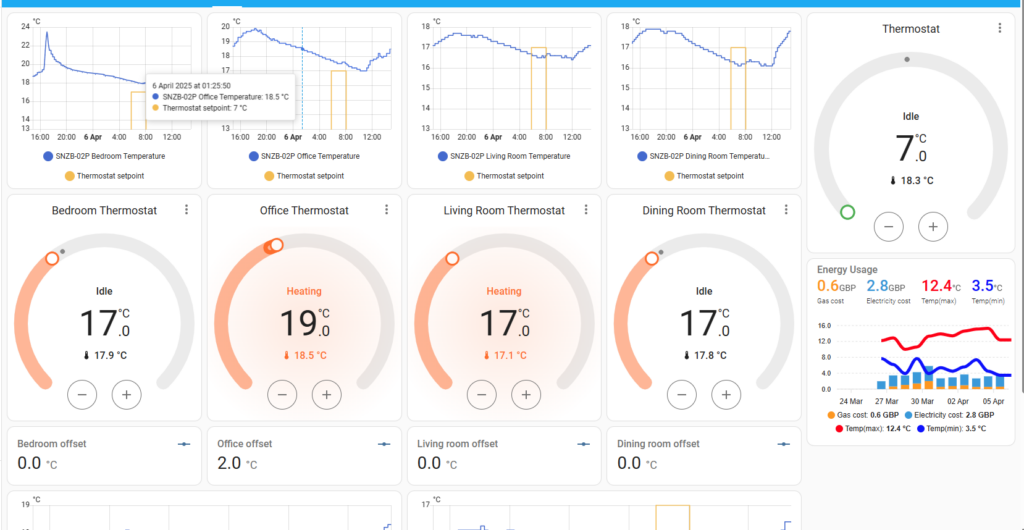
In the next post I will go through how to create a new Dashboard for all our newly bound sensors and add the ability to assign a fixed (changeable) temperature offset to each room for fine tuning of room temperatures around the home.
Hi, thx for this manual. Unfortunately, it doesn’t work for me even if I did it exactly the same way as described 🙁 when I change temperatures at the helper thermostat it does not have any effect on the physical thermostat.
This worked reliably all last year however the heating has not been running. Having just looked at this it appears somebody has changed something somewhere along the way and now this is not working so further investigation is needed! Thanks for letting me know and when I get some time will look into this….especially as its going to get colder.If you get anywhere in the meantime please let me know and I can update this
Looking a bit further I think this may have been due to updates on the TRVZB’s as it was just one misbehaving. Check they are normally on by going to the TRVZB itself, pressing the button and setting it to 35. They need to be set to max temperature then the thermostat helper can operate them by switching them on and off to open/close respectively.
If the temperature setting on the TRVZB itself is set to say 19 then if your generic thermostat turns it on and the temp is above 19 nothing will happen and it will remain off